
How To Add Keyframes In Premiere Pro + Expert Tips Teckers®
Premiere Pro Tutorial covering 3 methods of creating audio key frames on timeline clips. Learn how to create fades and dips in audio levels within clips and.

An Introduction to Using Keyframes in Premiere Pro Film Editing Pro
It helps you learn how to add keyframes in Premiere Pro much more effectively. Let's learn how to add a keyframe in Premiere. We'll work through real-world examples that help you set Premiere Pro keyframes of your own. How to Set Keyframes in Adobe Premiere Pro (2023 Tutorial Guide) Below, you're going to learn how to add a keyframe in.

Keyframe Audio Premiere Pro Adjust Volume Quick And Easy YouTube
Tips For Using Keyframes in Premiere. If you want to smooth out the animation your keyframes create, you can play with the Velocity. This is how quickly or slowly the value of the property changes over time. There is a second line below the value line under your keyframes which you can click and drag on to bring up some blue bars.

Adding Audio Track Keyframes in Premiere Pro — Premiere Bro
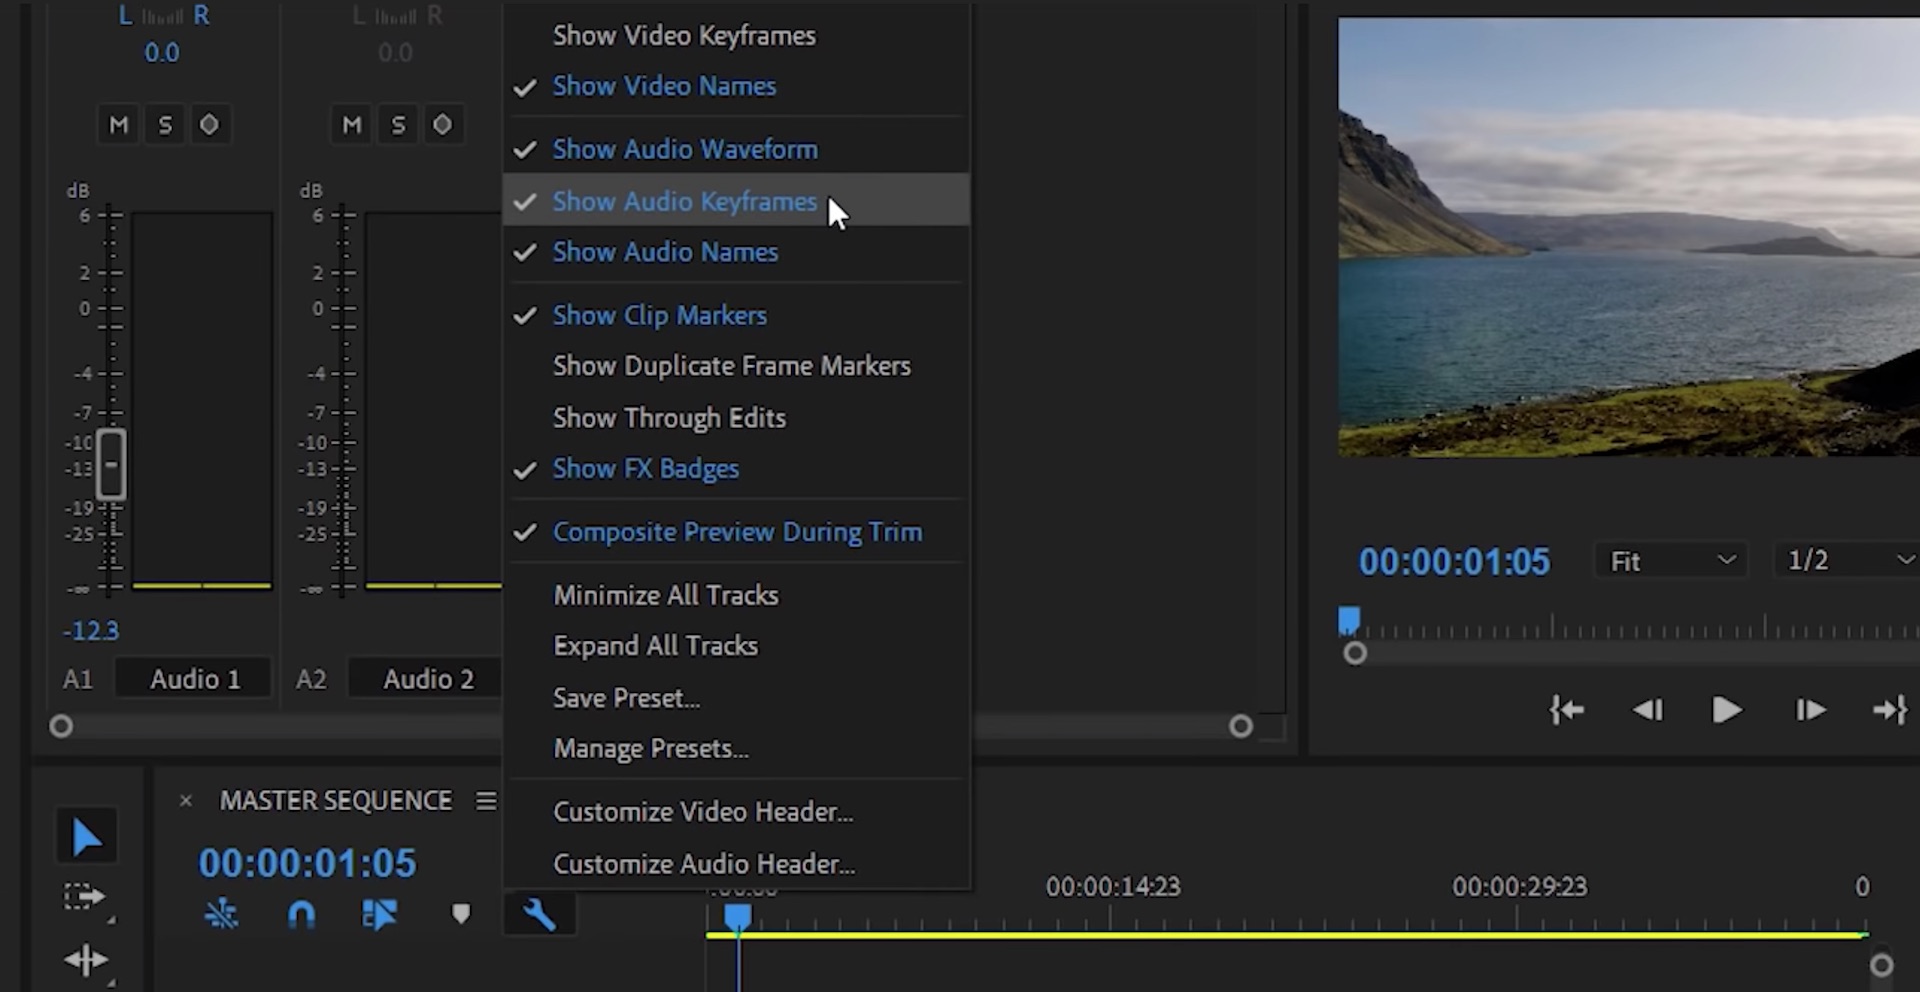
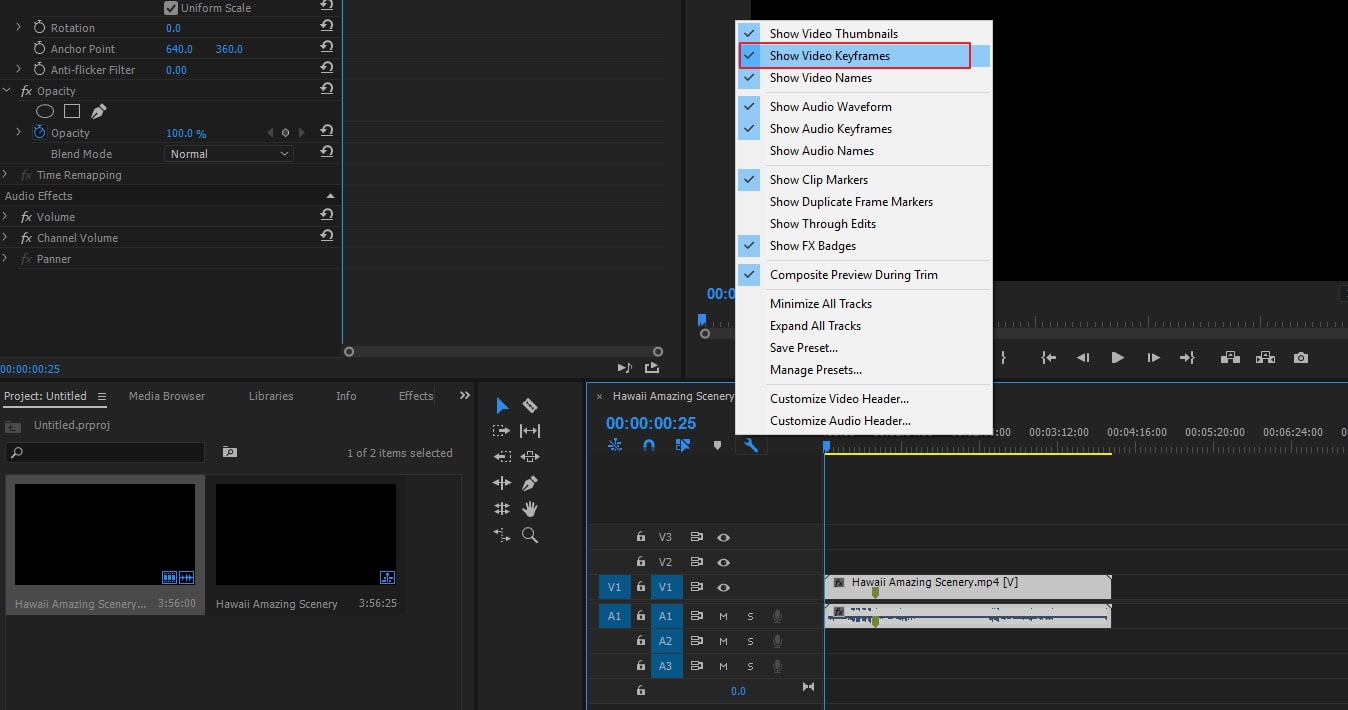
Click the Show Keyframes button in the track header of a video or audio track, and choose one of the keyframe options from the Show Keyframes menu. Right-click (Windows) or Control-click (Mac OS) the clip containing the keyframe properties you want to view.

How to Add Keyframes to Audio in Adobe Premiere pro YouTube
Learn how to control and keyframe your audio in Premiere Pro. In this video, I'll break down the difference between using a crossfade audio transition and co.

Utilizando Keyframes para controlar o volume do audio no Adobe Premiere
Keyframes are markers that indicate a change in the value of a particular parameter over time. In Premiere Pro, you can add keyframes to audio, video, and effects properties, allowing you to create smooth transitions and visual effects. How To Add Keyframes In Premiere Pro. Below is a straightforward guide to adding keyframes in Premiere Pro:

How To Add Keyframes In Premiere Pro + Expert Tips Teckers®
Introduction: Audio Editing in Premiere Pro Using Keyframes. This Instructable is designed as a guide to manipulating audio within Premiere Pro, whether it be to readjust volumes in order to overlay tracks onto each other and blend them better, or to redesign a single track into something that better suits the video clip shown along side the.

How To Add Keyframes In Premiere Pro + Expert Tips Teckers®
Creates keyframes only at points that do not have a linear relationship to the start and end keyframes. For example, suppose you are automating a fade from 0 dB to -12 dB. With this option selected, Premiere Pro only creates keyframes at the points that represent an increase in value from the beginning (0 dB) and ending (-12 dB) keyframes.
Adding Audio Track Keyframes in Premiere Pro — Premiere Bro
In this video tutorial, you will learn how to add keyframes to audio in Adobe Premiere Pro. Keyframes are an essential tool for adjusting the volume levels o.
How to Add/Hide Keyframes to Video/Audio in Adobe Premiere Pro
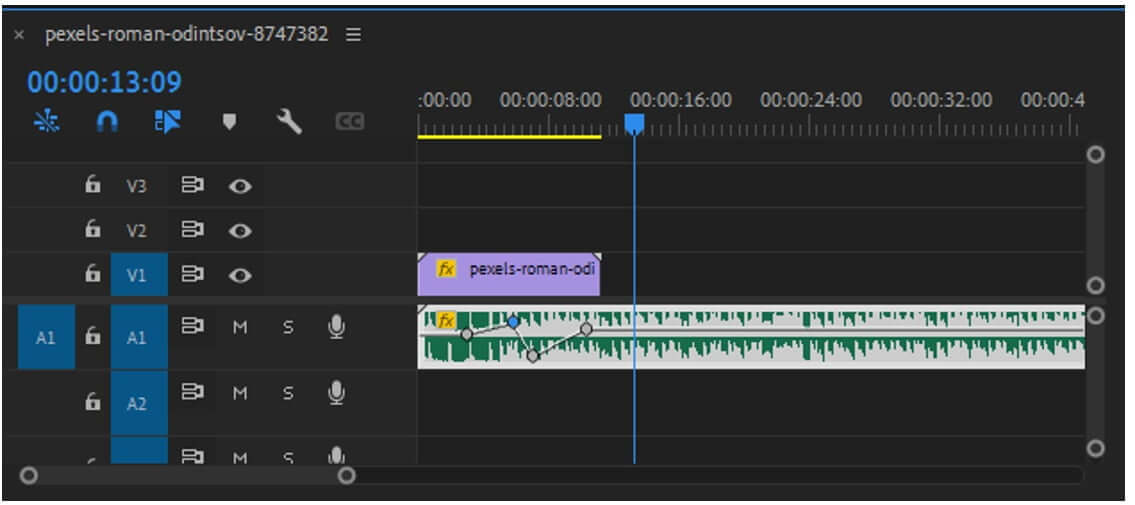
Drag a keyframe or segment up or down to change the value. As you drag, a tool tip indicates the current value. If no keyframes are present, dragging adjusts the value for the entire clip or track. Drag a keyframe left or right to change the time location of the keyframe. As you drag, a tool tip indicates the current time.

How To Fix/Adjust Audio in Adobe Premiere Pro Using Keyframes YouTube
In this tutorial I show you how to adjust your volume and loudness using audio keyframes. The first step is to increase the size of your Audio Track so that.
How to Add, Remove Keyframes and Change Values in Premiere Pro
This is an automatic amount of keyframes, and most likely you'll have even more of these. And the way to correct the overabundance of little keyframes is to go underneath Premiere Pro preferences, Audio, and it's over here under Minimal Interval Thinning. I've already changed this, but I'm going to change it again. I'm going to change it to 600.

Premiere Pro Using keyframes to control audio volume YouTube
The process of adding keyframes to audio in Premiere Pro is similar to adding texts but with slight differences. Step 1: Add the Audio Track on Adobe Premiere Pro. Launch your Premiere Pro then import an audio track to the timeline by selecting Project > Import. Alternatively, you can drag and drop the audio. Step 2: Show Keyframes for the.

Audio Keyframes Adobe Premiere Pro Training YouTube
Part 1. How to Add Keyframes to Video/Audio in Premiere Pro. Premiere Pro is an excellent video editor, but i would recommend iMyFone Filme, Filme is more cheaper than Premiere Pro.Filme is a much more comprehensive video editing tool.It supports a wide range of file types and offers all common editing tools, along with filters, transitions, animation, text, fast video mode, and much more, you.

KEYFRAMING AUDIO in Premiere Pro YouTube
If the current-time indicator is positioned within a selected clip, keyframes are pasted in that clip. If audio keyframes are cut or copied, Premiere Pro pastes in the first track where it finds a corresponding effect property, looking first at a sequence's audio tracks, then its submix tracks, and then the master track.

Premiere Pro Discover the Hidden Controls in Keyframes Larry Jordan
Working With Audio Keyframes. A common use of keyframes in Premiere Pro is for adjusting audio levels. When working with audio keyframes, you will mostly want to work with 'Spatial interpolation'> 'Continuous bezier.' This property creates smooth transitions in the audio between the volume levels.